Five: Docker Server Deployment
In the previous series of articles, we introduced how to use CLIProxyAPI on a local computer. This article will go a step further and explain how to complete the deployment on a server through Docker.
1. Environment Preparation
Before you start, please make sure you have a usable VPS (Virtual Private Server). This article will use the Debian 13 system as an example for demonstration.
At the same time, please make sure that Git and Docker are already installed on your server.
If they are not installed yet, you can install them with the following commands:
1. Install Git
apt update && apt install git -y2. Install Docker
You can use the one-click script provided by the official to install:
bash <(curl -fsSL [https://get.docker.com](https://get.docker.com))2. Deploy CLIProxyAPI
After the preparations are ready, please execute the following commands in order to clone the project and initialize the configuration.
git clone https://github.com/router-for-me/CLIProxyAPI.git
cd CLIProxyAPI
cp config.example.yaml config.yaml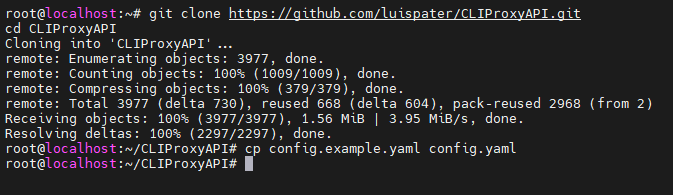
At this time, we can open the config.yaml file for editing. This tutorial will use the following minimal configuration as an example:
port: 8317

# Please fill in the folder location according to your actual situation
auth-dir: "~/.cli-proxy-api"

request-retry: 3

quota-exceeded:
  switch-project: true
  switch-preview-model: true

api-keys:
# Please set the Key yourself, used for client access to the proxy
- "ABC-123456"
Please note: When deploying with Docker, it is recommended to keep the default setting of
auth-dirwithout modification.
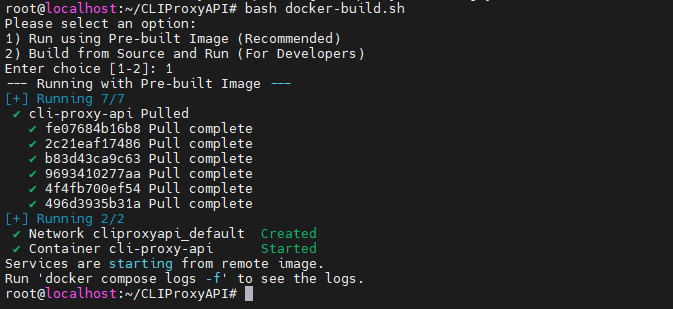
After editing the config.yaml file, we execute the following command to execute the Docker container build script.
bash docker-build.shThe script will provide two options:

- Option 1: Run directly using the pre-built image on Docker Hub (
docker compose up -d), which is fast. - Option 2: Compile the image locally on the server and then run it, which is suitable for scenarios that require custom modifications.
In this tutorial, we choose Option 1 to quickly start the service. After a while, the service will start successfully.
3. View Logs
Although the script prompts to use docker compose logs -f to view the logs, since the program redirects the logs to a file by default, you need to use the following command to view the logs in real time:
tail -f ./logs/main.log4. Add OAuth Authentication
Now the program is running normally. If you need to add a relay Key, you only need to edit the configuration file as described in the previous article. This time, we will focus on how to add an authorization authentication file through OAuth.
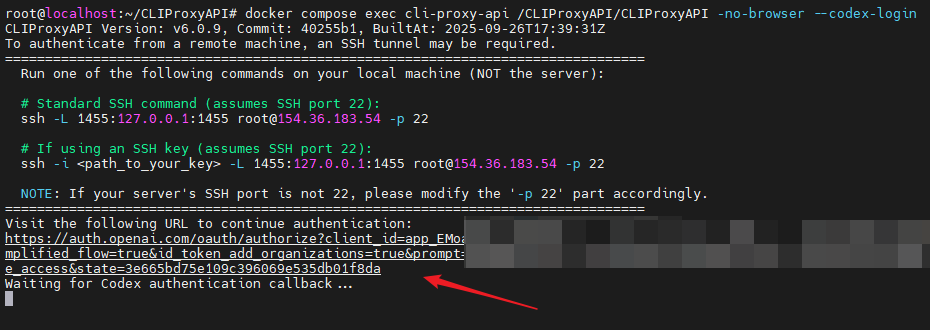
Step 1: Generate an authentication link on the server side
Taking adding Codex as an example, please execute the following command in the project root directory:
docker compose exec cli-proxy-api /CLIProxyAPI/CLIProxyAPI -no-browser --codex-loginThe program will generate a command to establish an SSH tunnel. Please copy the entire command starting with ssh at the arrow.
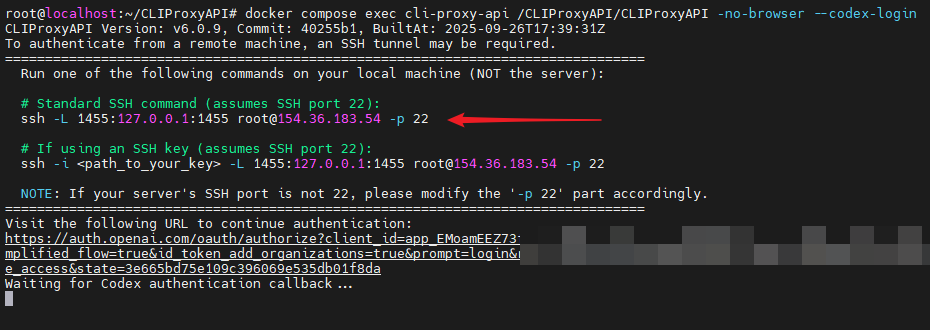
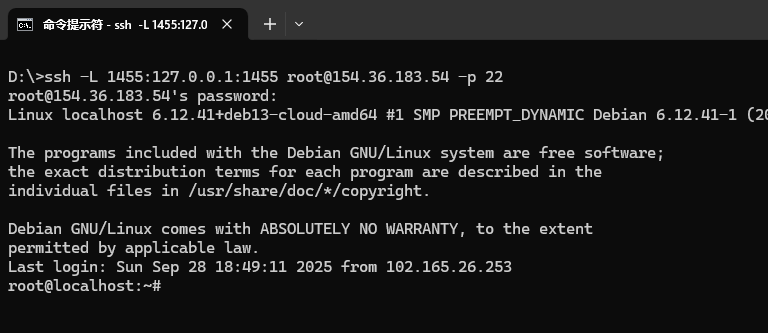
Step 2: Establish an SSH tunnel locally
In the terminal or command line tool of your own computer, paste the command you just copied.
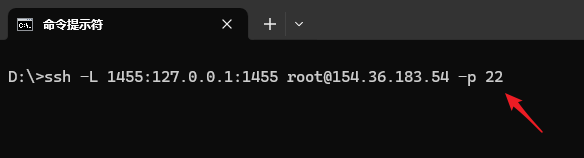
Special note: You need to replace the port number after the
-pparameter in the command (22in the example) with the actual SSH port of your VPS.
After pressing Enter, enter the SSH login password of the server. After a successful connection, please keep this terminal window open, and then return to the terminal where you just operated the server.
Step 3: Complete authorization through the browser
Copy the link pointed to by the arrow on the server terminal
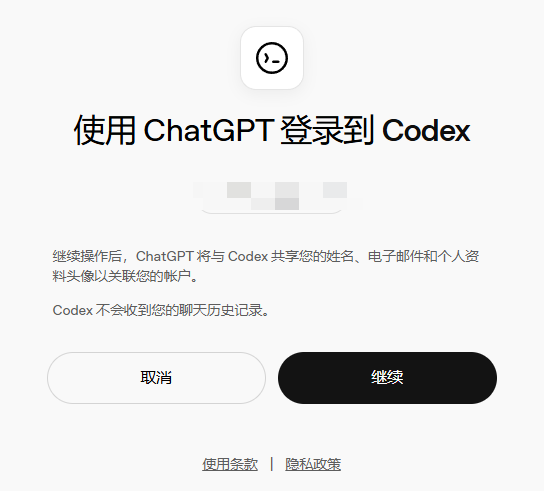
Open this link in the browser of your local computer, log in with your ChatGPT account and authorize
After successful authorization, you will see the following screen:
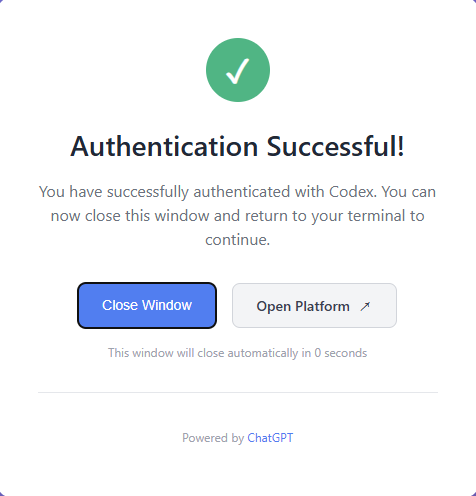
At the same time, the server's terminal will also show that the authentication file has been successfully saved.

So far, the authentication of Codex is all completed. For other services that require OAuth authorization, such as Claude and Antigravity, the operation process is similar.
5. Principle Summary
Finally, let's summarize the principle of this remote OAuth authentication process:
The OAuth authentication of Claude, Codex, and Antigravity all require a "Callback" process to receive the authorization token. Due to security restrictions, the callback address of the service provider is usually forced to be set to localhost.
When we execute the authorization command in the Docker container, there is no browser environment in the container, and we must open the authorization web page on the local computer. But after successful authorization, the browser will try to access localhost, which will only access our own computer, and cannot pass the token to the program on the remote server.
The role of SSH Tunnel is to build a bridge: it forwards all network requests on a certain port of our local computer (for example, 1455) to the same port of the server through an encrypted SSH connection. In this way, when the browser accesses the local http://localhost:1455, the request is actually forwarded to the CLIProxyAPI program that is listening on port 1455 on the server, thus cleverly completing the remote authentication.
As an alternative to SSH Tunnel, you can also manually replace localhost with the IP or domain name of your server when the browser jumps to the localhost callback link. However, please note that this method requires you to correctly configure the server's firewall or reverse proxy to ensure that the callback request can be correctly received, otherwise the authentication may fail.
6. Client Use
After completing the above configuration, when using the client, you only need to point the request endpoint address to your server's IP:port (for example, http://YOUR_SERVER_IP:8317), and the rest of the operations are exactly the same as local use.
So far, you have mastered the complete process of deploying CLIProxyAPI on the server through Docker. Go and enjoy the convenience brought by AI!