Zero-Cost Deployment: Render (Git Storage)
After the release of yesterday's article "Zero-Cost Deployment (ClawCloud)", I went on to test the Render platform and found that its free plan does not include persistent storage. After reporting this to the author of CLIProxyAPI, he updated the version overnight, adding the function of persistent storage through Git. In this way, we can save the configuration files and authentication files in a private GitHub repository, without relying on the persistent storage of the container cloud.
Next, this article will guide you step by step on how to deploy CLIProxyAPI on a container service without persistent storage (such as Render's free plan). As for the part of OAuth authentication through EasyCLI, it is exactly the same as the deployment on ClawCloud, please refer to the previous article.
1. Github Preparation
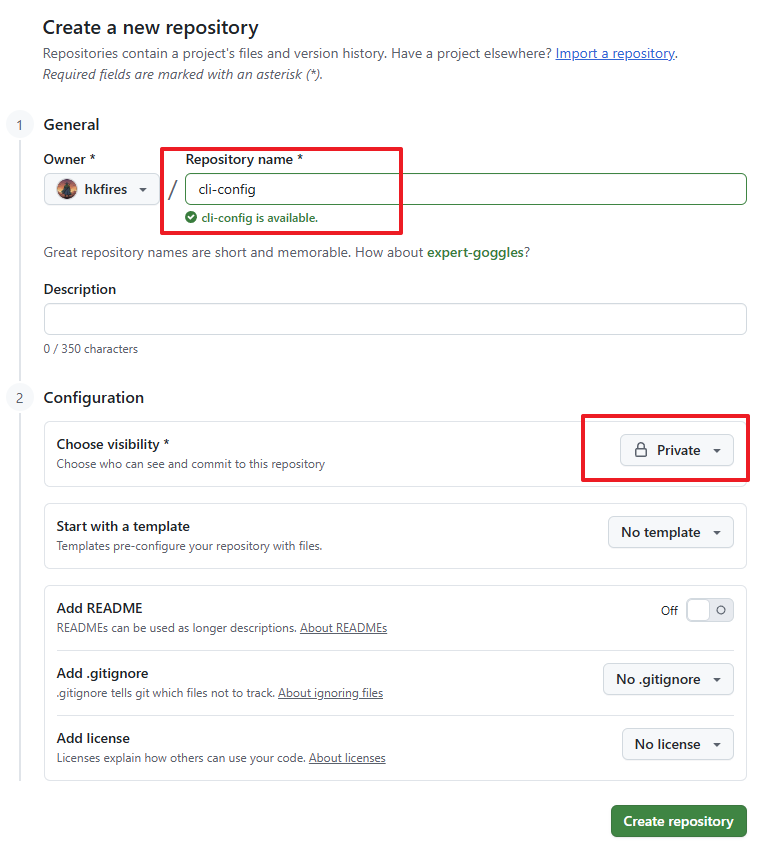
First, we need to create an empty repository on GitHub. The repository name can be customized, but it must be set to private, otherwise the sensitive information such as the API Key you add will be exposed.
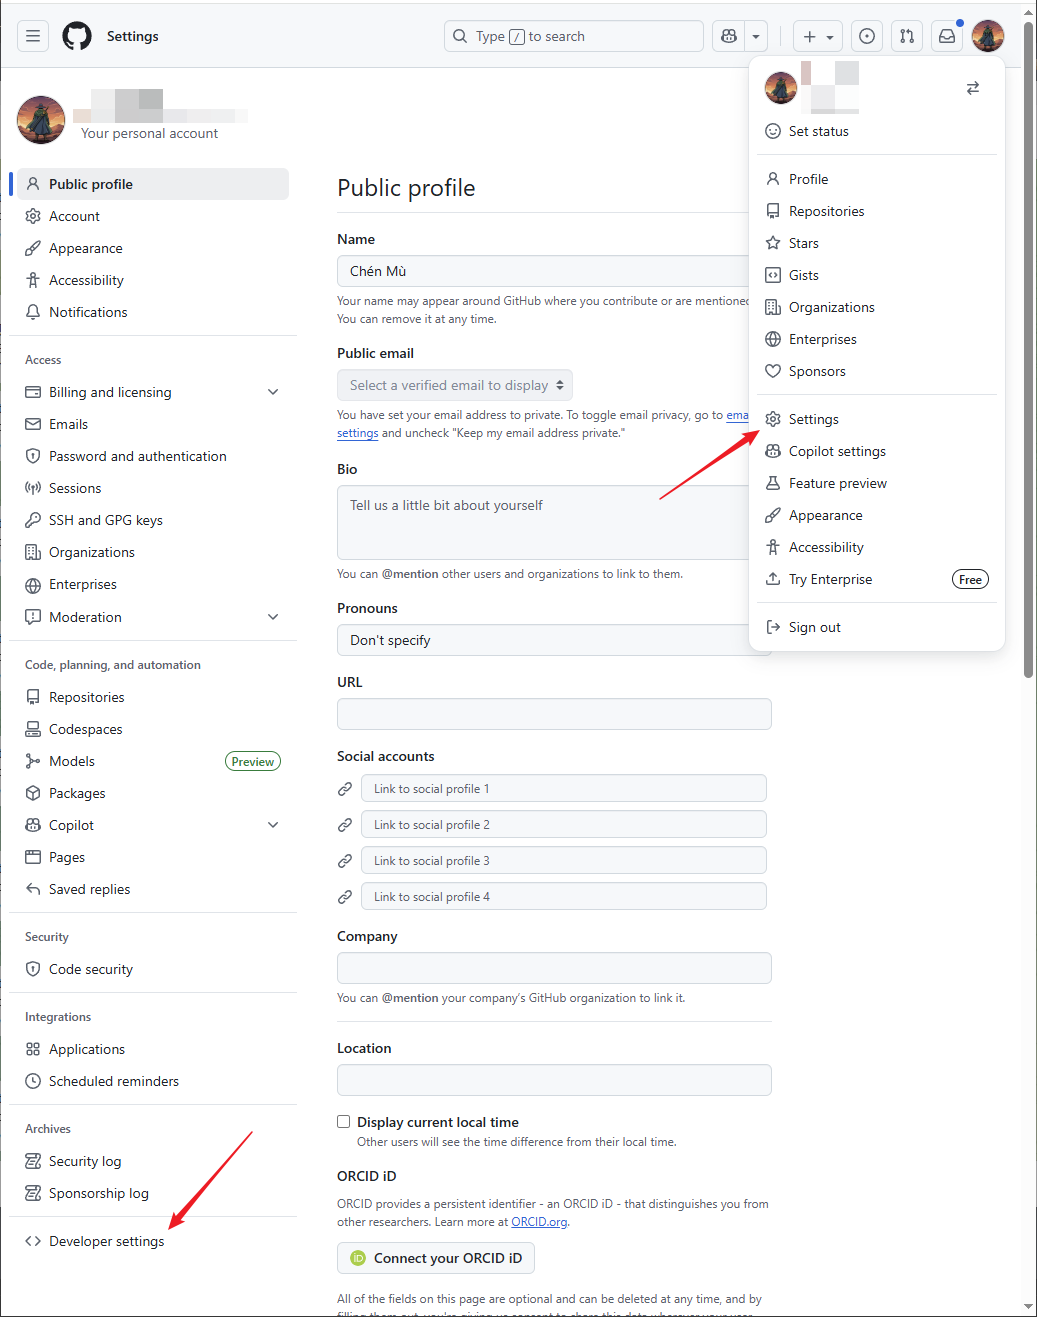
After creating the repository, note down the URL address of the repository. Next, we click on the personal avatar in the upper right corner of the page, enter Settings, and then click Developer Settings at the bottom of the left menu.
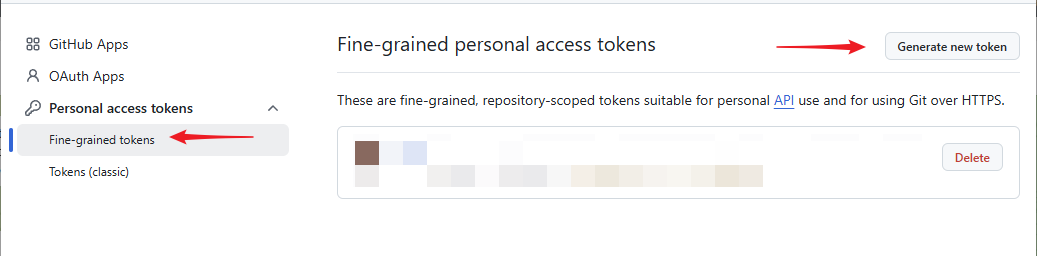
Next, click Personal access tokens -> Fine-grained tokens in order, and then click Generate new token in the upper right corner.
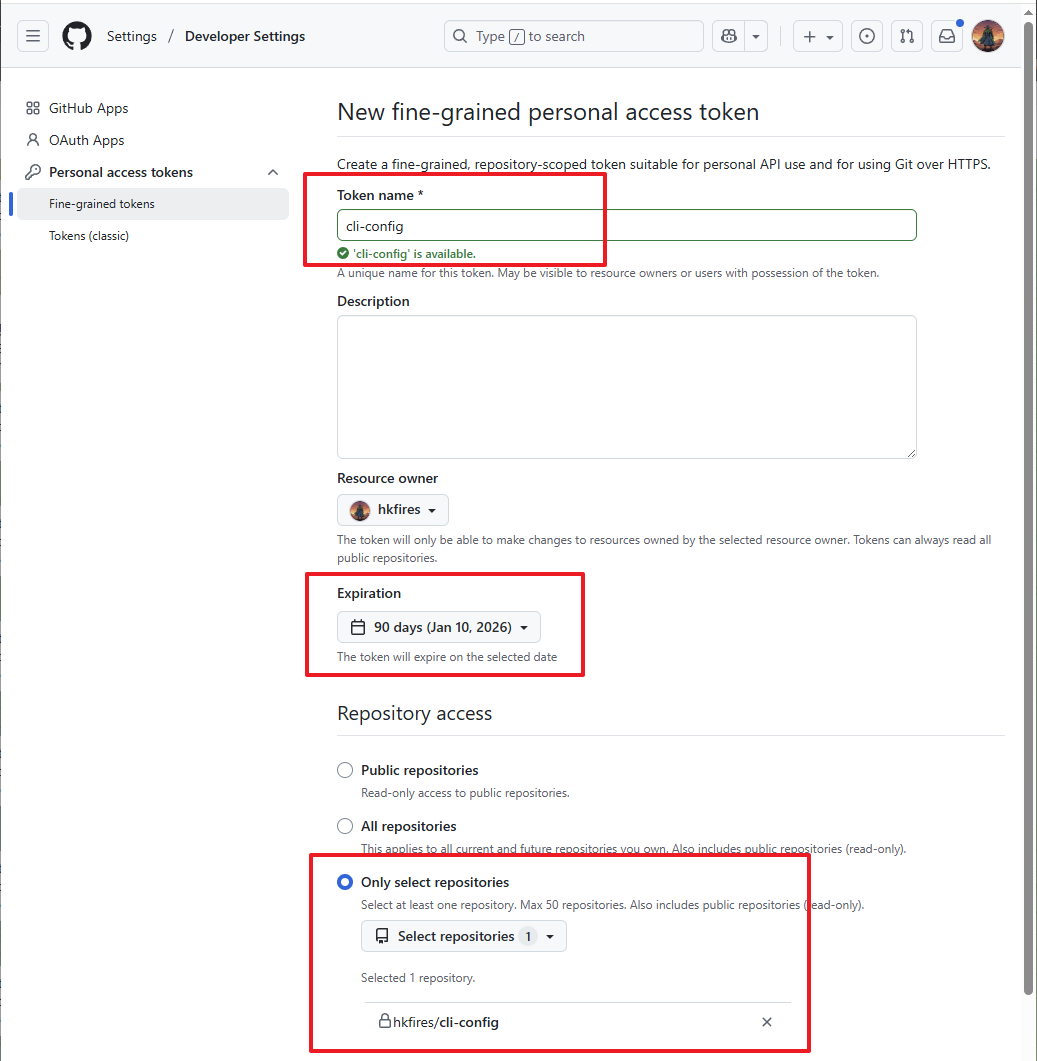
Fill in the Token name as shown in the figure (customizable), select the expiration time according to your needs (Expiration), and select Only select repositories in Repository access, and then select the blank repository we just created.
Scroll down the page, find Contents in Permissions -> Add permissions, add it and change its permission from Read-only to Read and write.
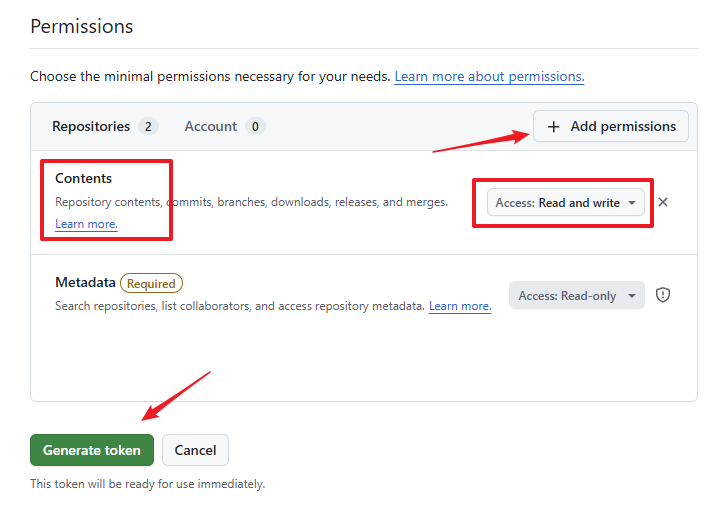
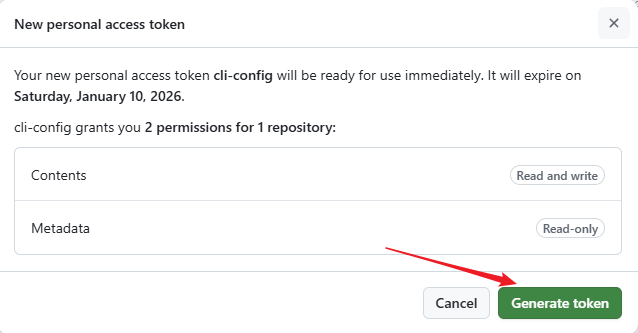
After confirming that the permission settings are correct, click Generate token at the bottom of the page.
At this time, the generated Token will be displayed on the page. Please note that this Token will only be displayed once. After the page is closed, it will not be viewable. Please be sure to copy and save it properly.
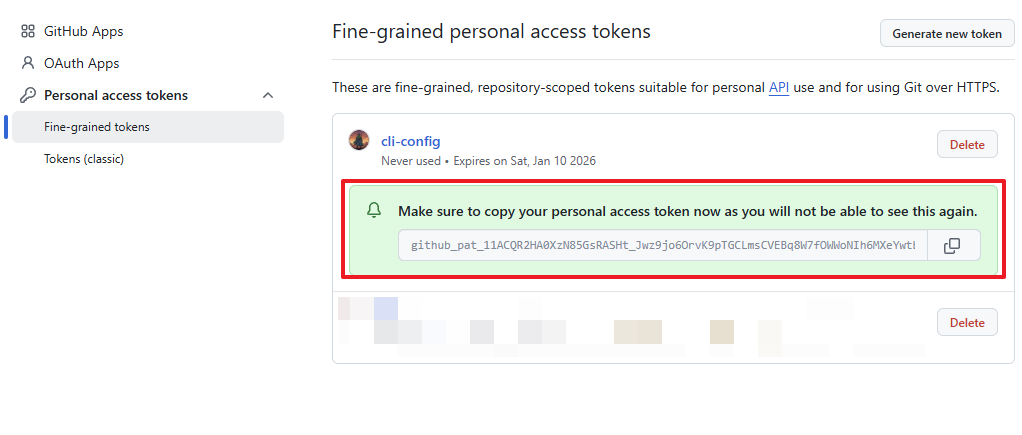
So far, the preparation work for GitHub is complete.
2. Render Deployment
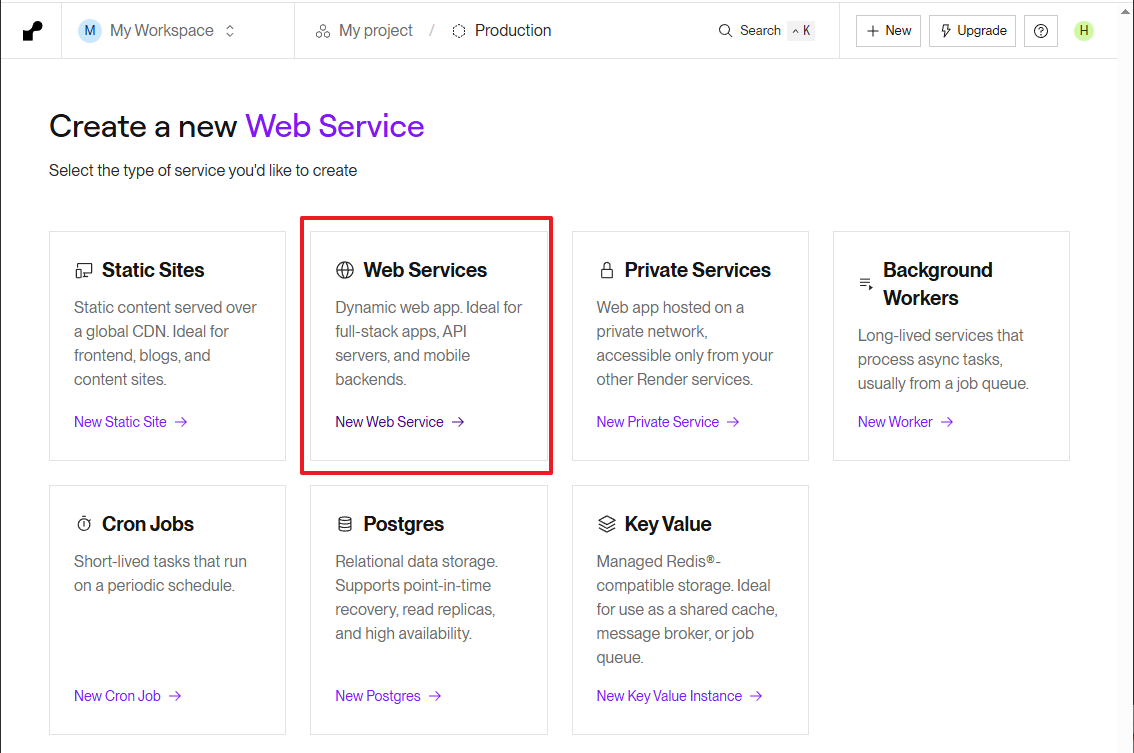
First, please make sure you have registered a Render account. After logging in, create a new project and select New Web Service.
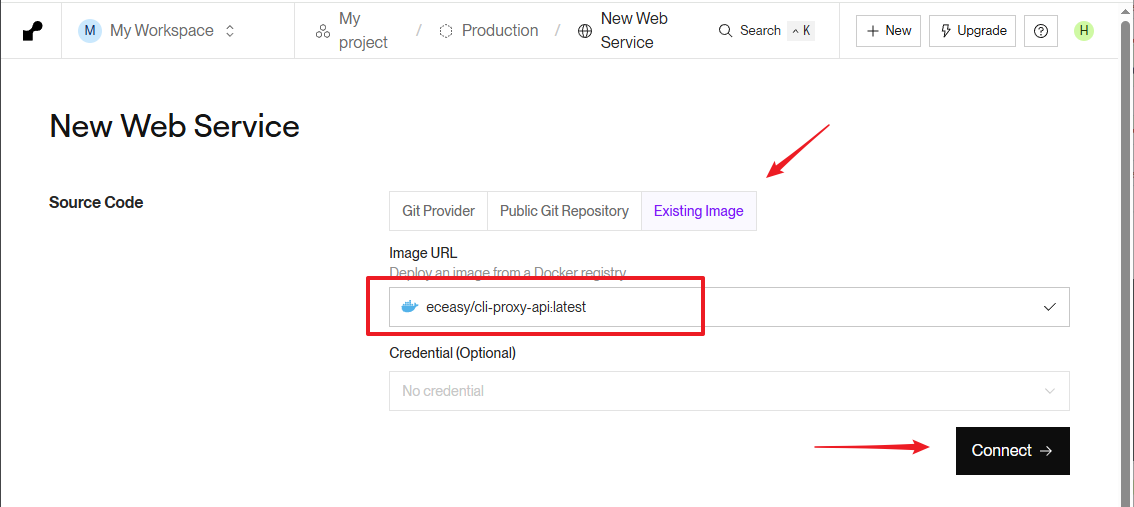
Select Existing Image in the deployment method, enter eceasy/cli-proxy-api:latest in the Image URL, and then click Connect.
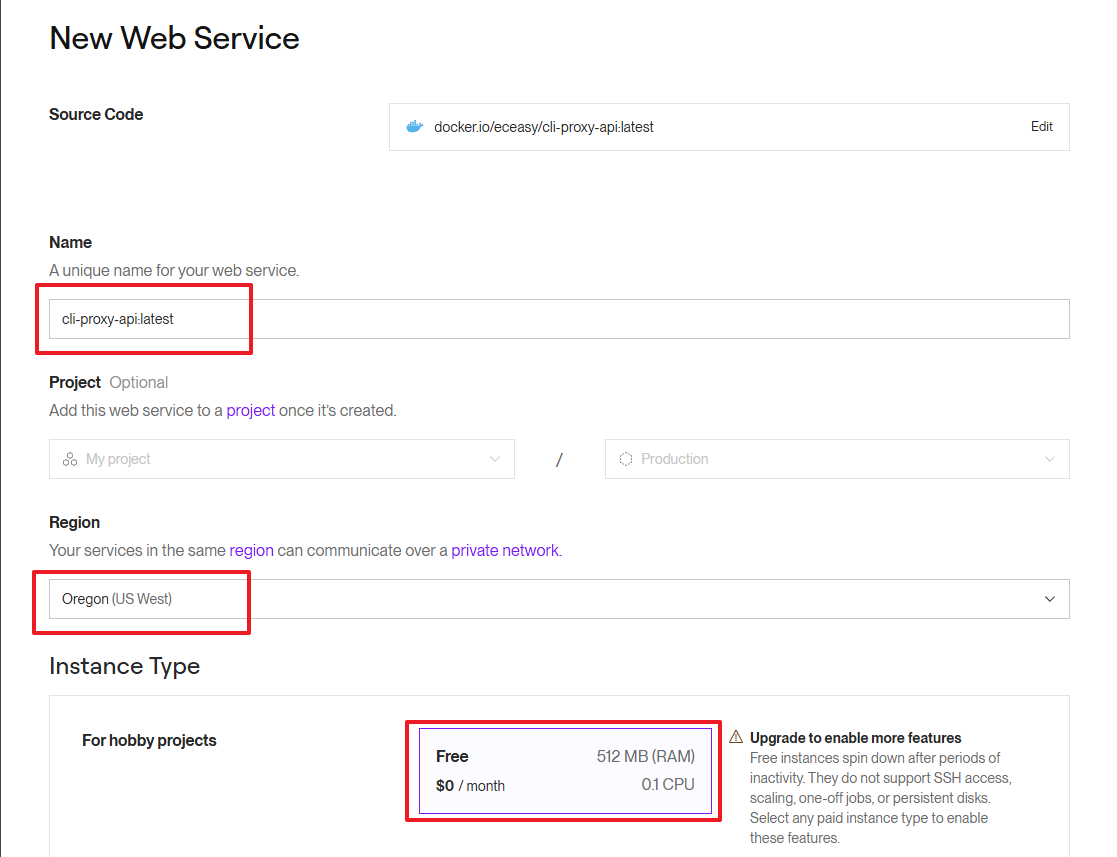
Enter the service name (Name, customizable), select the region (Region, you can choose according to your personal preference), and make sure the instance type is Free.
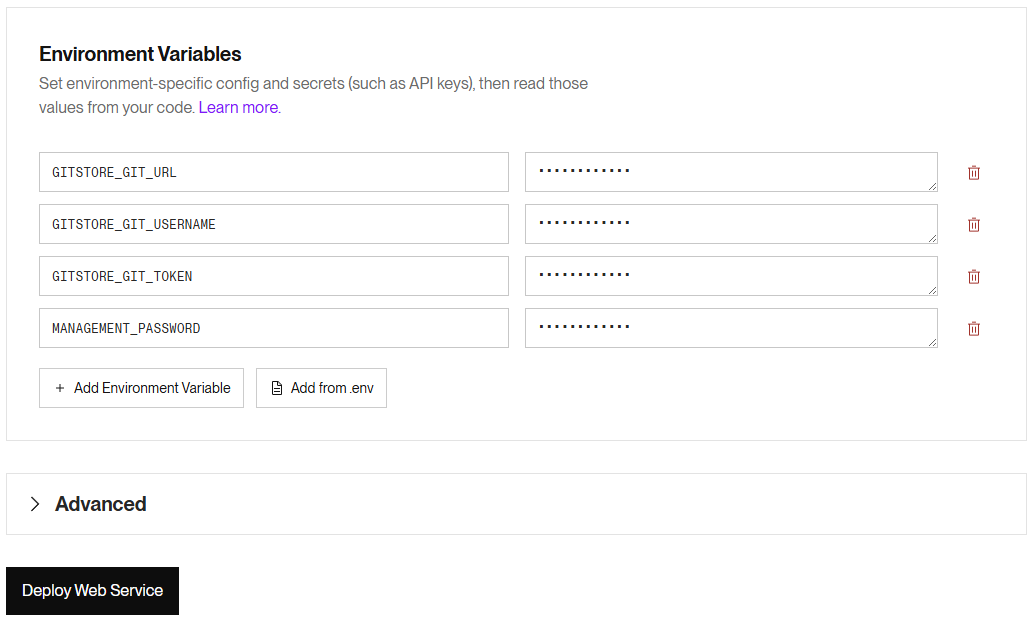
Next, we need to add 4 environment variables:
GITSTORE_GIT_URL: Your GitHub repository addressGITSTORE_GIT_USERNAME: Your GitHub usernameGITSTORE_GIT_TOKEN: The Personal Access Token you just createdMANAGEMENT_PASSWORD: The password for logging in to the management interface
After entering, click Deploy Web Service at the bottom of the page.
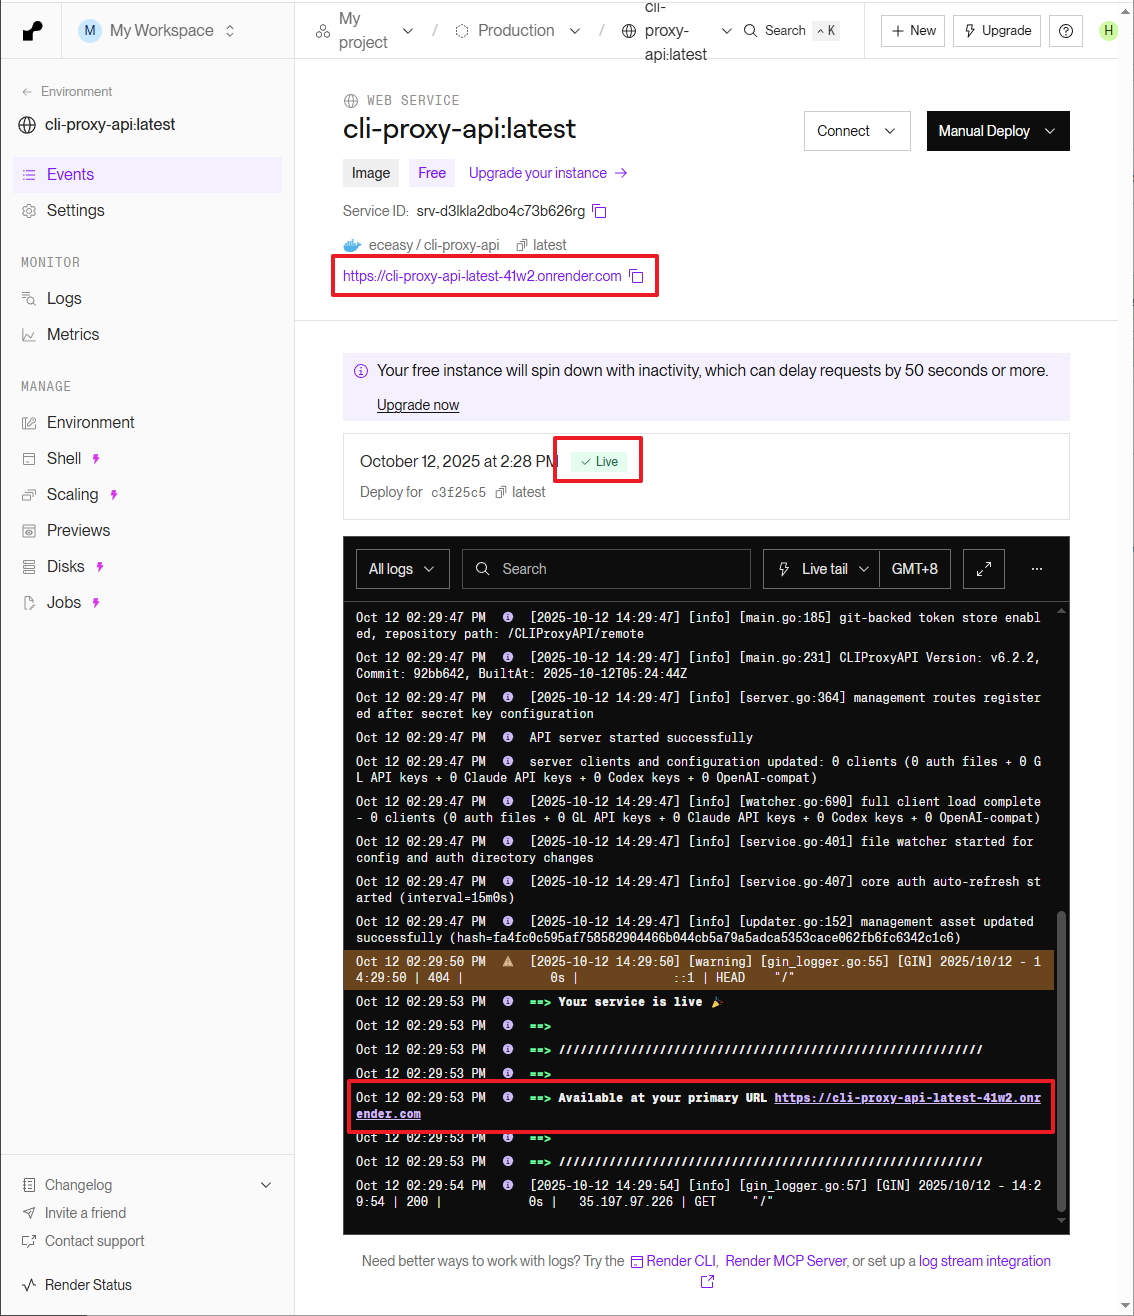
Wait for the deployment log to scroll. When the status becomes Live and the log shows Available at your primary URL:XXXX, the program has successfully started.
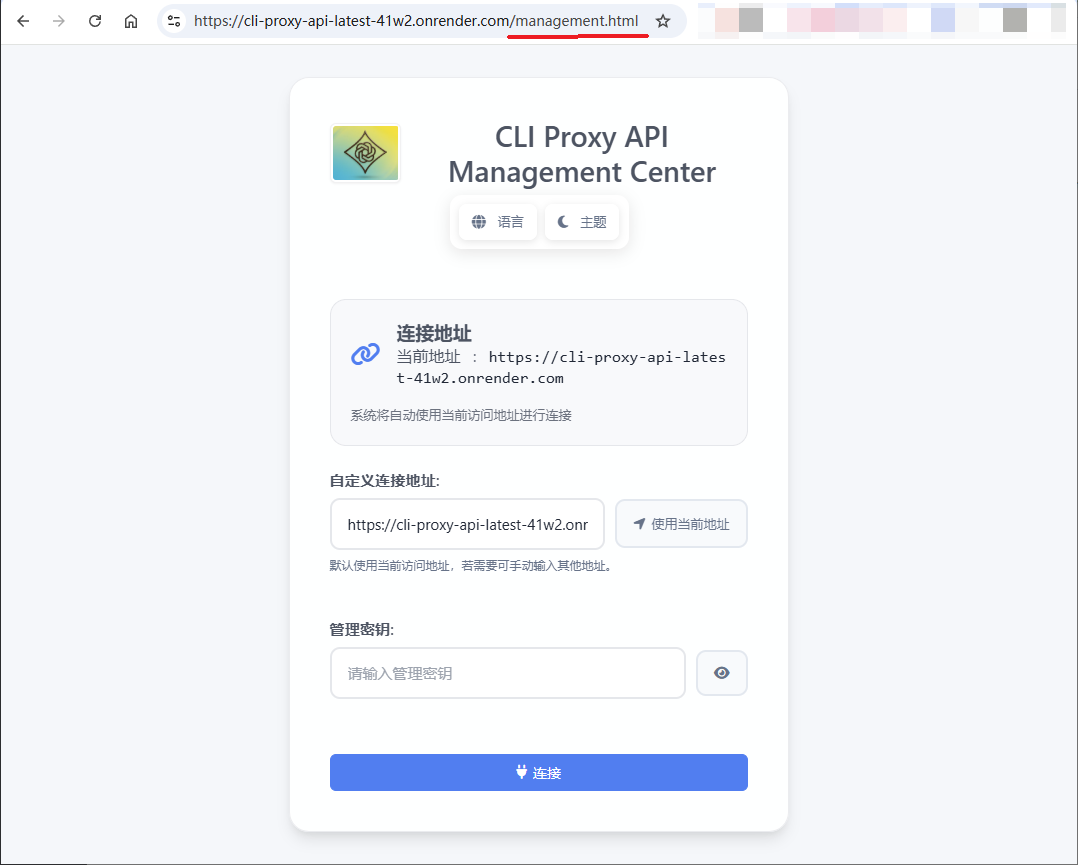
Use the URL provided by Render and add /management.html after it to enter the WebUI. Enter the MANAGEMENT_PASSWORD you set to log in.
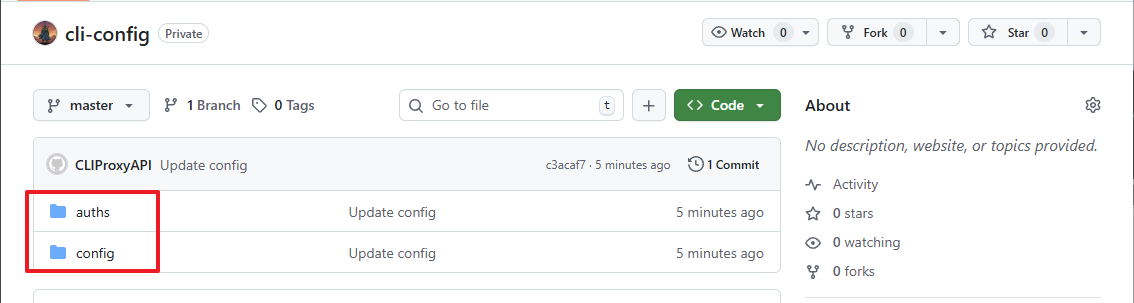
At this time, if you check your GitHub repository again, you will find that two folders have been automatically generated in it.
So far, the entire process of deploying CLIProxyAPI on Render is complete. Other similar container cloud platforms can also be deployed using this method, and you can explore them yourself.
3. Precautions
- CLIProxyAPI added this function after v6.2.2. If you want to specify the image version, the selected version should be at least
eceasy/cli-proxy-api:v6.2.2. - After deploying in this way, the
remote-managementpart of the configuration file will no longer be effective, and the management password will be based on the environment variable. This means that if you want to modify the management password, you need to directly modify the environment variableMANAGEMENT_PASSWORD. - Using GitHub to store configuration files and authentication files does not mean that they can be shared and called in multiple container instances at the same time. Please be sure to avoid this situation to avoid conflicts.
- Please note that any manual changes made directly in the GitHub repository while the container is running will be invalid. If you really need to modify it manually, please be sure to stop the container service first.
- It is recommended to use WebUI or EasyCLI to manage the configuration. Using EasyCLI can also perform remote authentication of OAuth. For specific methods, please refer to the relevant content in "Zero-Cost Deployment (ClawCloud)" mentioned at the beginning of this article.