Zero-Cost Deployment (AIStudio Reverse Proxy)
Please note: The deployment solution in this tutorial needs to be used with
CLIProxyAPI. Before you begin, please ensure you have a running instance ofCLIProxyAPI.
Starting from v6.3.x, CLIProxyAPI supports connecting to AI Providers via WebSocket, with AIStudio being the first one supported.
However, this method requires a browser to be always open to run the WebSocket communication program on AIStudioBuild, which can be inconvenient. If you choose to deploy it on a VPS, you will face the issue of high memory requirements for the VPS.
To solve this problem, I spent some time trying various headless browser solutions. Ultimately, I chose to use Docker for deployment on HuggingFace, which takes full advantage of the large memory of HuggingFace's free instances to achieve zero-cost deployment.
Step 1: Configure the AIStudioBuild Application
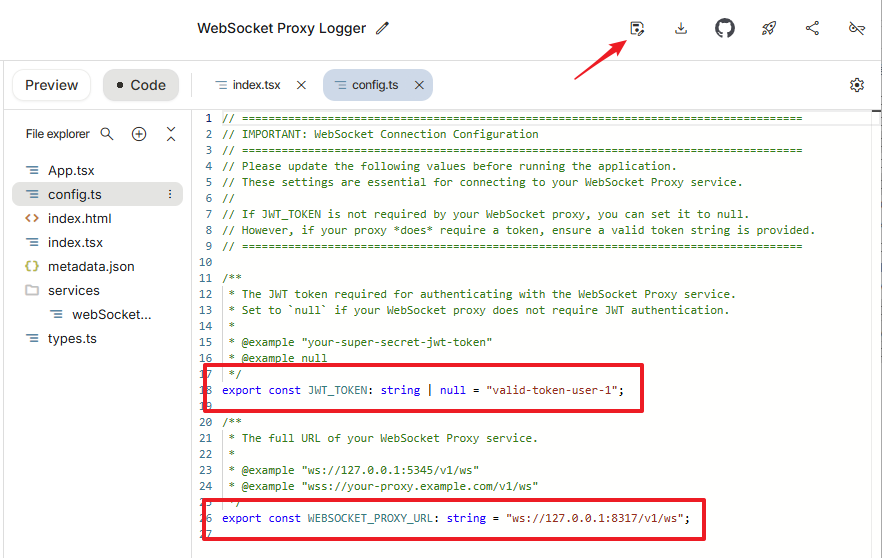
You need to configure the WebSocket communication program on AIStudioBuild according to your CLIProxyAPI settings: Open the official sample program, copy it, and then you must modify the two places marked in the red box in the image. Specifically, if wsauth is set to true in CLIProxyAPI, you need to set JWT_TOKEN to the api-keys value intended for authentication in CLIProxyAPI. Set WEBSOCKET_PROXY_URL to the address of your CLIProxyAPI, for example: wss://mycap.example.com/v1/ws. After configuring, save it and keep the link to this application for later use.
When using multiple accounts, you need to perform an additional step: set the application's access permission to Public.

Security Warning: After setting it to Public, please keep your link safe. Do not share this link publicly to avoid leaking authorization information.
Step 2: Prepare AIStudio Cookie
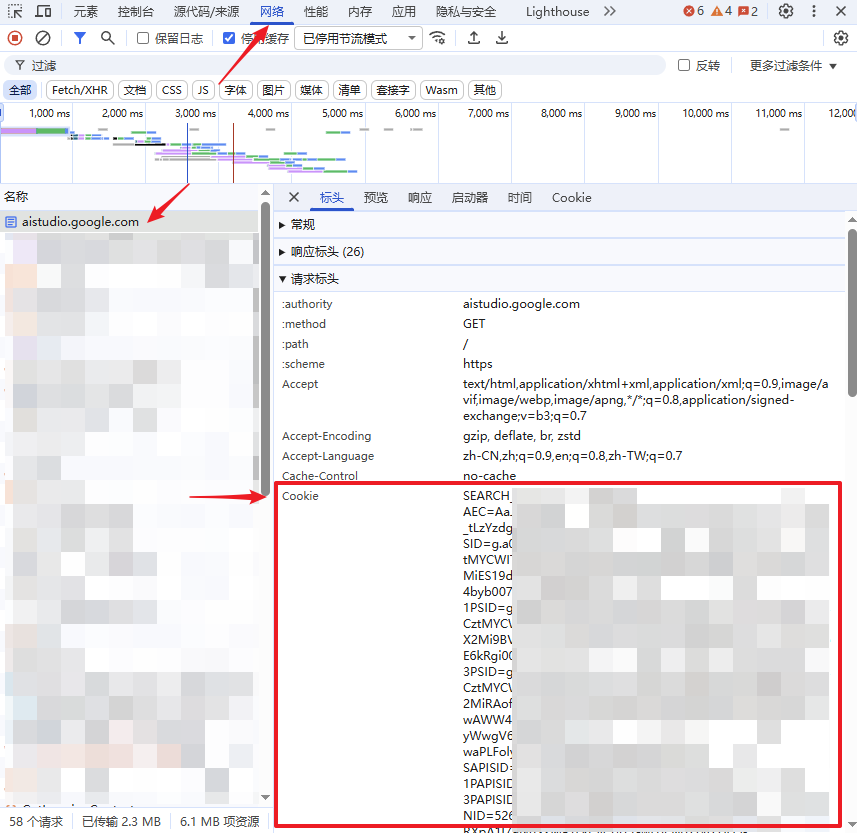
For this step, it is recommended to use your browser's private mode. Log in to https://aistudio.google.com/ and copy the Cookie from the browser's developer tools. The specific location is shown in the image below:
Step 3 (1): Deploy HuggingFace Space
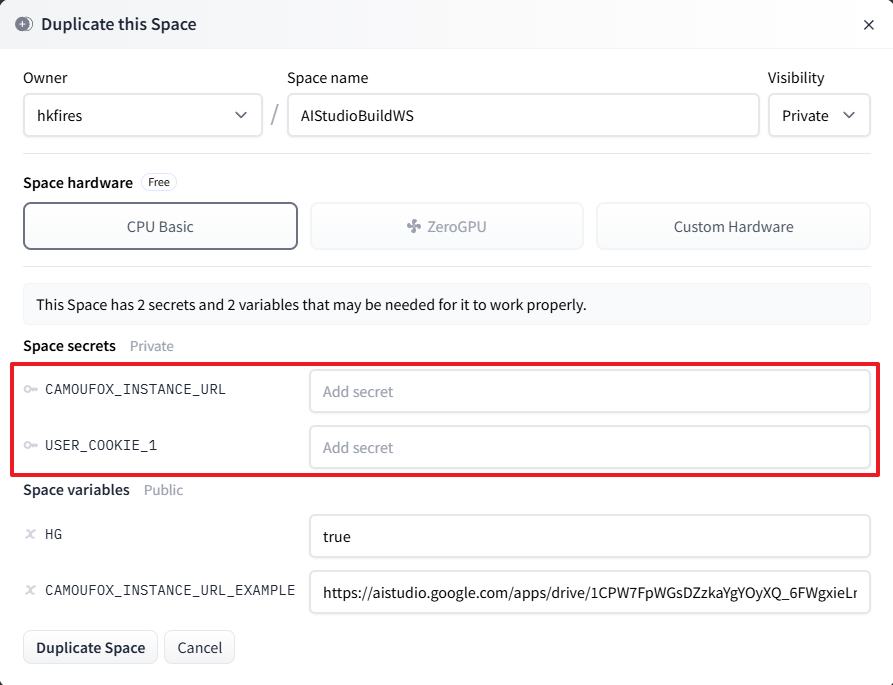
Open https://huggingface.co/spaces/hkfires/AIStudioBuildWS and duplicate the Space. Fill in the CAMOUFOX_INSTANCE_URL field with the link to the program you prepared in Step 1, and fill in the USER_COOKIE_1 field with the Cookie you prepared in Step 2. Then, click "Duplicate Space".
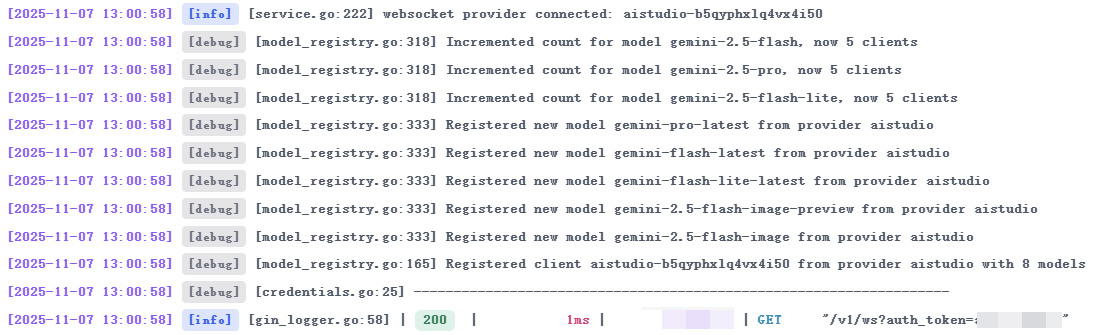
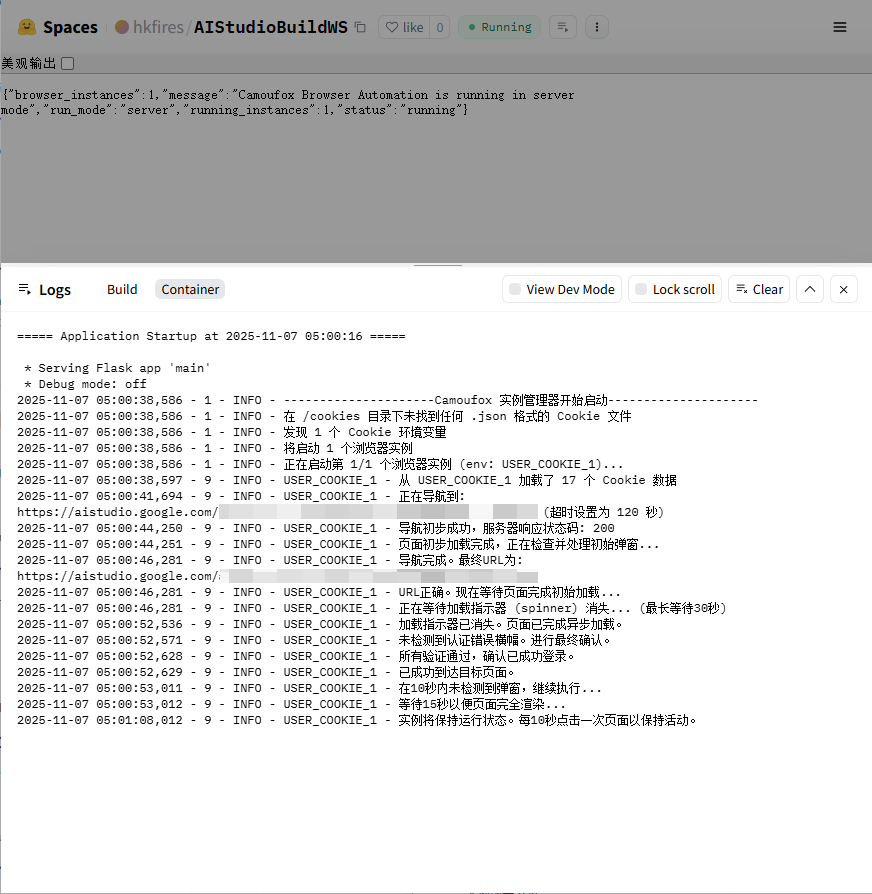
Wait for HuggingFace to complete the build. When you see logs like the following, the deployment is successful:
If you have multiple accounts, refer to USER_COOKIE_1 and add environment variables like USER_COOKIE_2, USER_COOKIE_3, etc., in the HuggingFace Space settings.
Important Reminder: Cookies are sensitive information. Please be sure to use "Secrets" (not "Variables") to store them to prevent leakage.
Step 3 (2): Server Docker Deployment
If you have your own server (VPS), you can also use Docker Compose for deployment.
Download the Code
bashgit clone https://github.com/hkfires/AIStudioBuildWS.git cd AIStudioBuildWSConfigure Environment Variables Copy
.env.exampleto.envand fill in the necessary information (CAMOUFOX_INSTANCE_URLandUSER_COOKIE_1, etc.).You can also place Cookie files in JSON format (any filename) in the
cookiesdirectory, and the program will automatically read them.bashcp .env.example .env nano .envStart the Service
bashdocker compose up -d --build
After a successful deployment, you should see logs similar to the following in CLIProxyAPI. At this point, the entire deployment is complete.