AmpCode Usage Guide
You might not have heard of AmpCode (probably because there's no "free lunch" channel?). In fact, AmpCode has established itself in the AI programming field with its unique philosophy. Its core feature is efficiency first, cost second—users don't need to worry about model selection; the system automatically calls the best model for the job. Therefore, AmpCode does not natively support model switching, let alone using third-party models.
AmpCode mainly has two modes:
- Free Mode: Free use of the Claude Haiku 4.5 model, at the cost of including ads (is this the only Agent tool with ads currently?).
- Smart Mode: Automatically selects the strongest model combination available. At this point in time (December 2025), Smart Mode typically calls Claude Opus 4.5 for complex tasks, Claude Haiku 4.5 for high-frequency simple responses, and uses GPT 5.1 as a SubAgent for multi-dimensional logical completion.
This article will teach you how to combine AmpCode + CLIProxyAPI to achieve the goal of "using your own models in AmpCode".
1. Configure CLIProxyAPI
First, we need a configured CLIProxyAPI. For specific deployment methods, please refer to my previous CLIProxyAPI tutorial series, which I won't repeat here.
After the regular configuration of CLIProxyAPI, we need to add the following AmpCode-related settings to the configuration file:
ampcode:
  upstream-url: "https://ampcode.com"
  restrict-management-to-localhost: false
  upstream-api-key: "sgamp_user_XXXX"
  force-model-mappings: false
  model-mappings:
    - from: claude-opus-4-5-20251101
      to: gemini-claude-sonnet-4-5
    - from: claude-sonnet-4-5-20250929
      to: gemini-claude-sonnet-4-5
    - from: claude-haiku-4-5-20251001
      to: gemini-2.5-flash-lite
Configuration Item Explanation:
upstream-url,restrict-management-to-localhost,upstream-api-key: If you have an AmpCode account and want to view session information in the official dashboard, please fill in these three items. Theupstream-api-keycan be copied from the AmpCode dashboard (as shown below).If you don't have an AmpCode account, just delete these three lines.Note: After a recent update to the AmpCode client, filling in upstream information is now mandatory, so this part is required.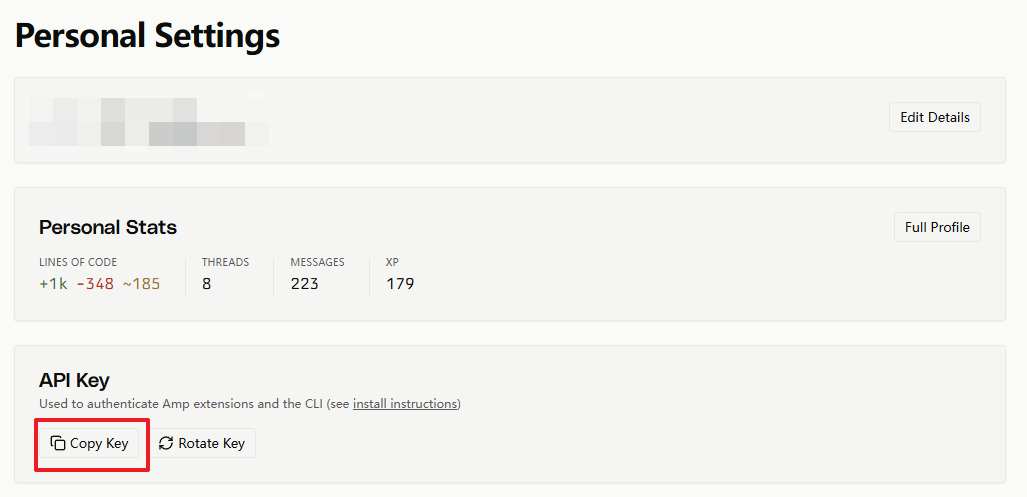
model-mappings(Important!): This is the most critical part of the configuration. We need to understand the processing logic of CLIProxyAPI: When AmpCode requests a specific model (e.g.,claude-opus-4-5-20251101), CLIProxyAPI will first look it up in the registered model list.- Case A: If the model exists, request that model directly (model-mappings does not take effect).
- Case B: If the model does not exist, CLIProxyAPI should have reported an error, but by configuring model-mappings, we can redirect the request to a model we specify (e.g.,
gemini-claude-sonnet-4-5).
An example to help understand:
Suppose AmpCode requests
claude-opus-4-5-20251101. If this model exists in CLIProxyAPI, then AmpCode will use theclaude-opus-4-5-20251101model in CLIProxyAPI; If this model is not configured in CLIProxyAPI, the system will trigger themodel-mappingsrule and hand over the request togemini-claude-sonnet-4-5for response. Through the above rules, we have successfully achieved "grafting", taking over AmpCode's requests with our own models.(If you still have doubts about this logic, it is recommended to read the above paragraph a few more times~)
force-model-mappings: This is a boolean value (trueorfalse), defaulting tofalse. When set totrue, CLIProxyAPI will force the application of redirection rules inmodel-mappings, even if "Case A" is met (i.e., thefrommodel itself exists in CLIProxyAPI). This option is very suitable for scenarios where you need to temporarily override or unify management of model requests. For example, even if you have already configuredclaude-opus-4-5-20251101in your CLIProxyAPI, you can still force all its requests to be redirected togemini-claude-sonnet-4-5by enabling this option.
Once the above configuration is completed, the CLIProxyAPI side is ready.
2. Configure AmpCode Client
AmpCode supports multi-platform clients. You can choose according to your usage habits. The following will explain two ways: configuring the command line tool (Amp CLI) and the VSCode extension.
Method 1: Configure Amp CLI
The following takes installing Amp CLI in WSL2 Debian as an example for reference.
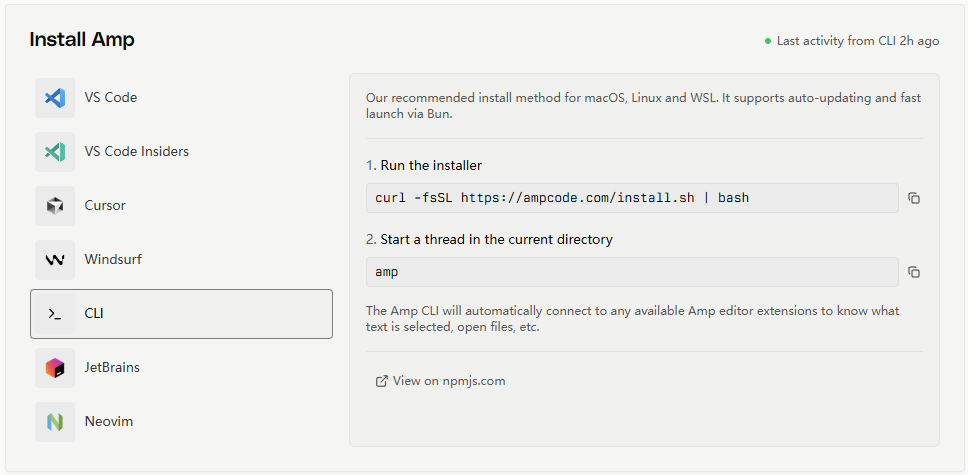
Copy the official installation script to install: curl -fsSL https://ampcode.com/install.sh | bash
Note: Do not run it immediately after installation; we need to edit the environment variables. Enter nano ~/.bashrc and add the following content at the bottom of the file:
export AMP_URL="http://Your-CPA-Deployment-Address:Port"
export AMP_API_KEY="Your-API-Key-Set-In-CPA"
After saving and exiting, run source ~/.bashrc to make the configuration take effect.
Method 2: Configure VSCode Extension
If you are more accustomed to developing in VSCode, AmpCode also provides an official extension.
Install Extension: Search for and install the
AmpCodeextension in the VSCode Extension Marketplace.
Open Settings: Search for
Preferences: Open User Settings (JSON)via the Command Palette (Ctrl+Shift+P) to open thesettings.jsonfile.Add Configuration: Add the following configuration to
settings.json, pointingamp.urlto your CLIProxyAPI service address:json{ // ... other configurations "amp.url": "http://Your-CPA-Deployment-Address:Port" }Login: After configuration is complete, click the AmpCode icon in the sidebar. The extension interface will display the URL you configured. Enter the
api-keysyou set in CLIProxyAPI in the red box to log in and use (note that it is not the Key provided by the official AmpCode website).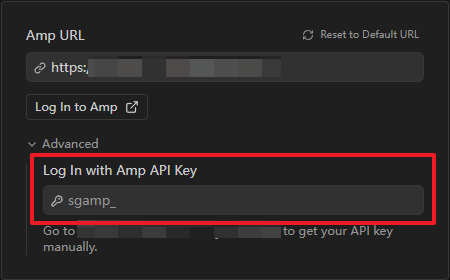
3. Verify Results
Regardless of which client you use, the verification method is similar:
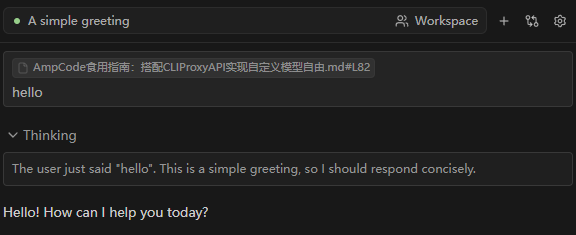
For Amp CLI users: Type
ampand try sending a prompt. If everything goes well, you will see the following interface:
For VSCode Extension users: After successful login, send a prompt in the AmpCode chat window, and the extension will return results normally.
At the same time, in the background logs of CLIProxyAPI, we can also clearly see that the corresponding request has been successfully forwarded:
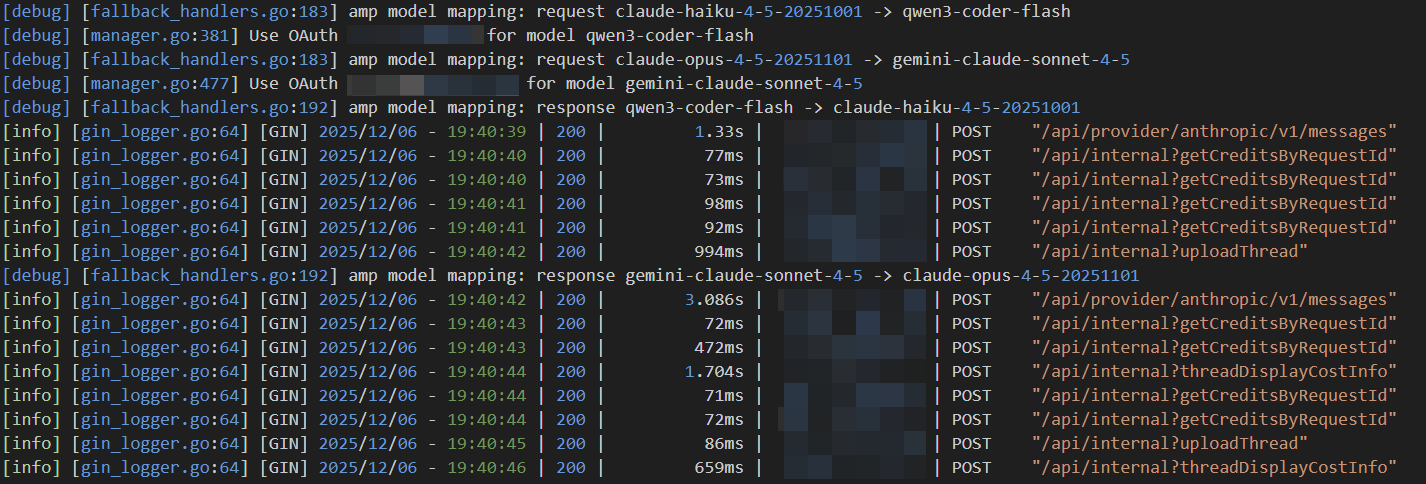
Mission accomplished!