Zero-Cost Deployment: ClawCloud (Built-in Storage)
Some time ago, I published an article "Five: Docker Server Deployment". Many netizens reported that they did not have a VPS and hoped that I could provide a tutorial on deploying on a container cloud.
In fact, since CLIProxyAPI supports Docker deployment, it can naturally run seamlessly on the container cloud. However, if it is run directly on the container cloud, there will be the following two main problems:
- Configuration file persistence: For the configuration file required for program startup, the container cloud often solves it by mapping the configuration file content to a specific file. Although it can run, if you have modified the configuration file, once the container restarts, all changes will be lost. This loss of configuration is unacceptable to us.
- Complex OAuth authentication: For providers that require OAuth authentication, in the Docker environment of a VPS, we can forward the authentication callback results to the server through an SSH tunnel. However, a pure container cloud environment usually does not support SSH tunnels, and it needs to be completed by adding multiple ports and manually modifying the domain name during callback, which is a very tedious process.
Therefore, after CLIProxyAPI is updated to adapt to the deployment of the container cloud, this tutorial will guide you step by step on how to complete the deployment on the container cloud.
The container cloud platform used in this tutorial is ClawCloud Run. Log in to the platform with a Github account that has been registered for more than 180 days to get a monthly recurring credit of $5. The CLIProxyAPI we deployed only consumes about $0.05 per day, which is more than enough. Other container cloud platforms are basically the same, please refer to this process for your own deployment.
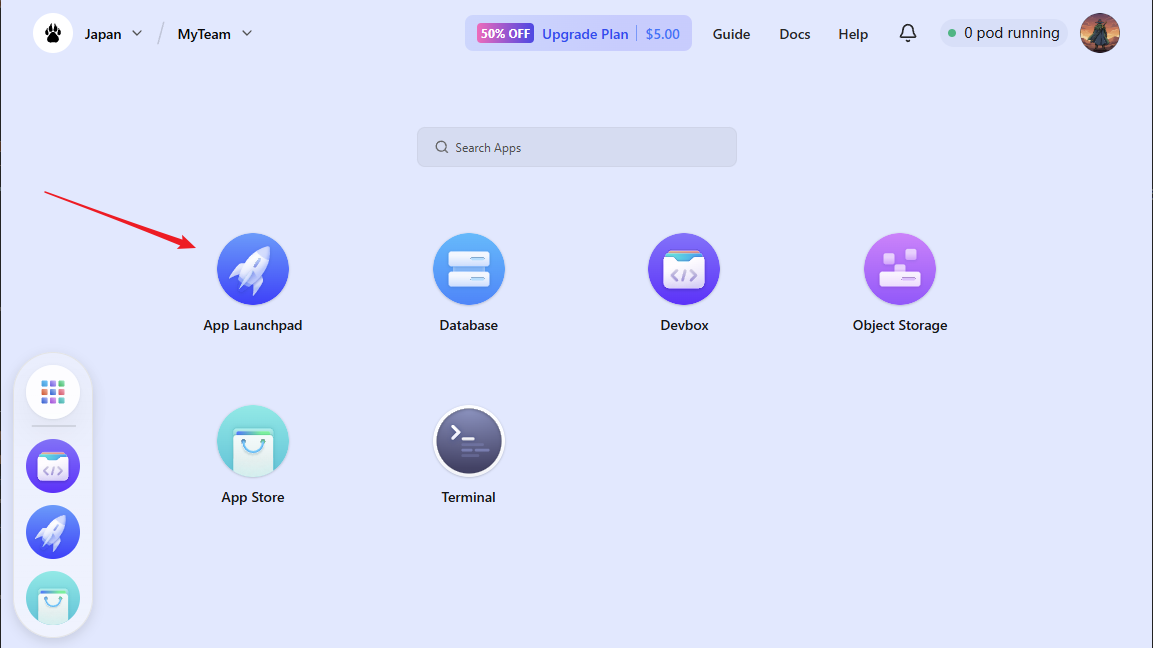
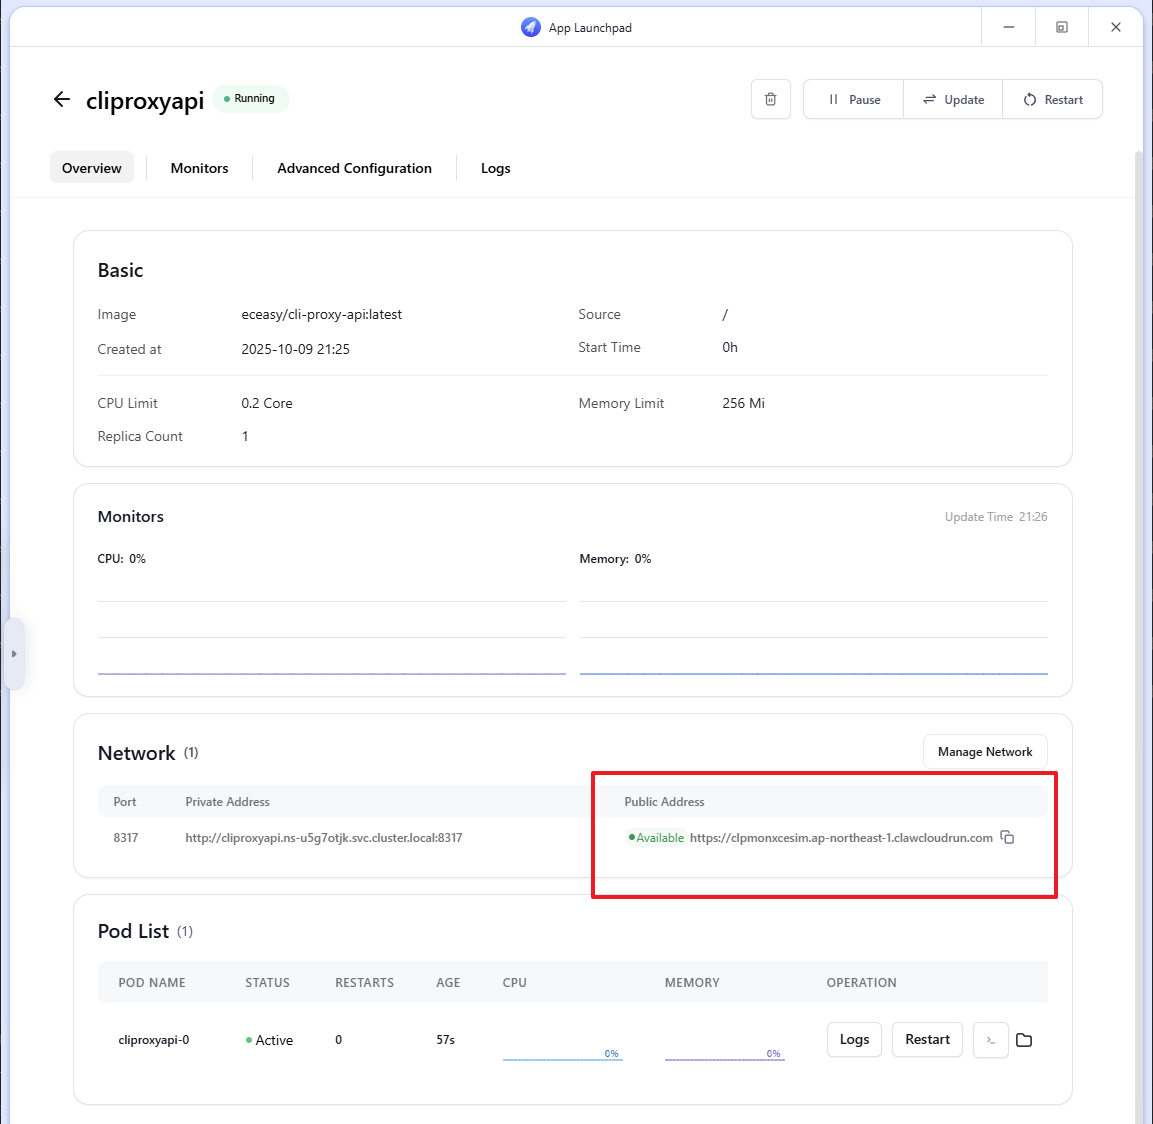
After logging in to ClawCloud Run, we click App Launchpad
Click Create APP

First, we fill in the basic information
- Application Name: Customizable, here fill in
cliproxyapi - Image Name:
eceasy/cli-proxy-api:latest - Network: Change the container port to
8317, and open Public Access at the same time

Scroll down the page, in the advanced settings, we need to fill in:
- Command:
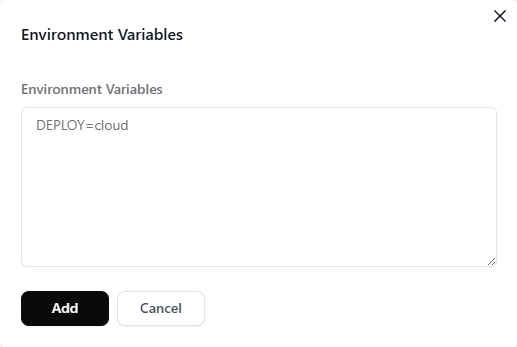
/CLIProxyAPI/CLIProxyAPI --config /data/config.yaml - Environment Variables:
DEPLOY=cloud - Local Storage:
/data
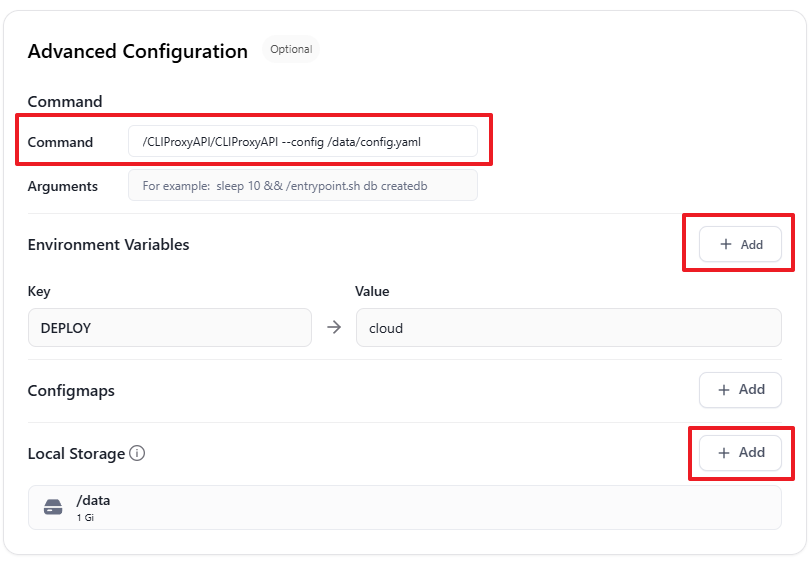
See the figure below for how to fill in environment variables and storage
 |  |
|---|
After confirming that all information is filled in correctly, click Deploy Application in the upper right corner, and the application will start to deploy
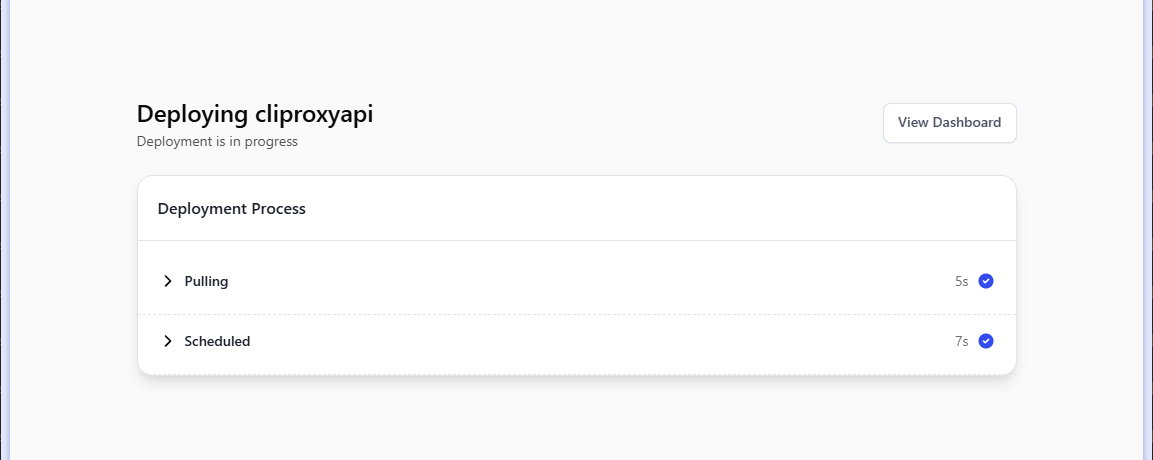
Wait a moment, and the application can be deployed successfully. When the Public Address status becomes Available, the corresponding URL is the one we use to access CLIProxyAPI. Please save it for later use.
While waiting for the deployment, we can prepare the config.yaml configuration file first. The example used this time is as follows. Please note: remote-management.secret-key is the key for remote management, and api-keys is the key used by the AI client to connect to CLIProxyAPI. Be careful to distinguish them.
port: 8317
remote-management:
  allow-remote: true
  secret-key: "ABCD-1234"
  disable-control-panel: false
auth-dir: "/data/auths"
debug: false
logging-to-file: false
usage-statistics-enabled: false
request-retry: 3
quota-exceeded:
   switch-project: true
   switch-preview-model: true
api-keys:
  - "EFGH-5678"
When the container status becomes Active
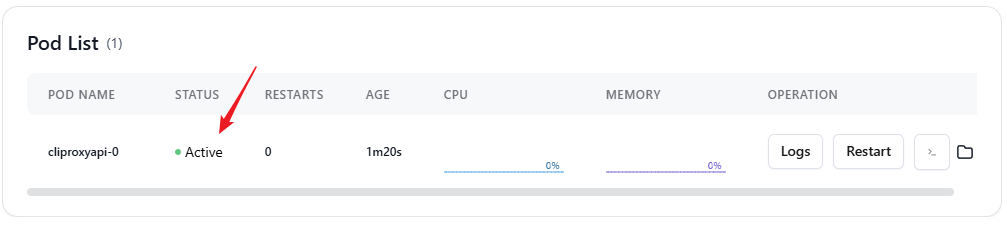
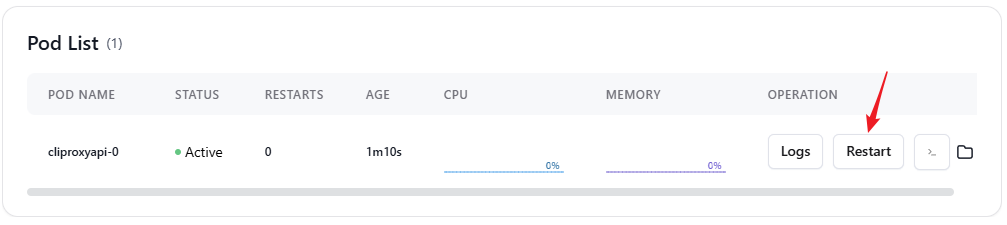
We click the button in the figure to open the previously added Local Storage
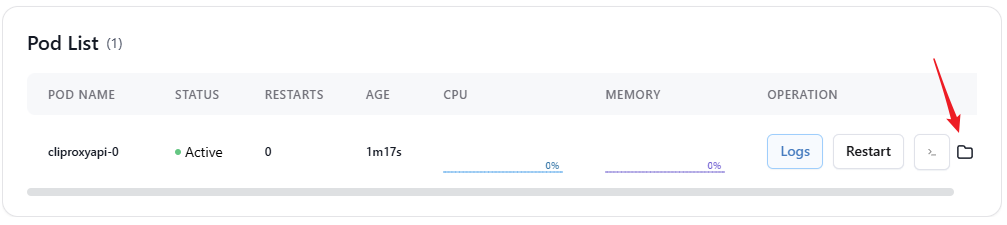
Click Upload in the upper right corner, select the config.yaml file you just prepared and upload it
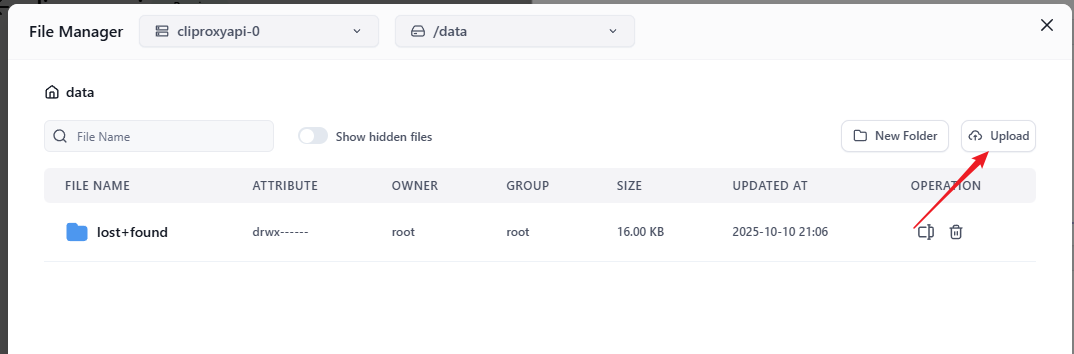
After the upload is complete, click Restart to restart the container
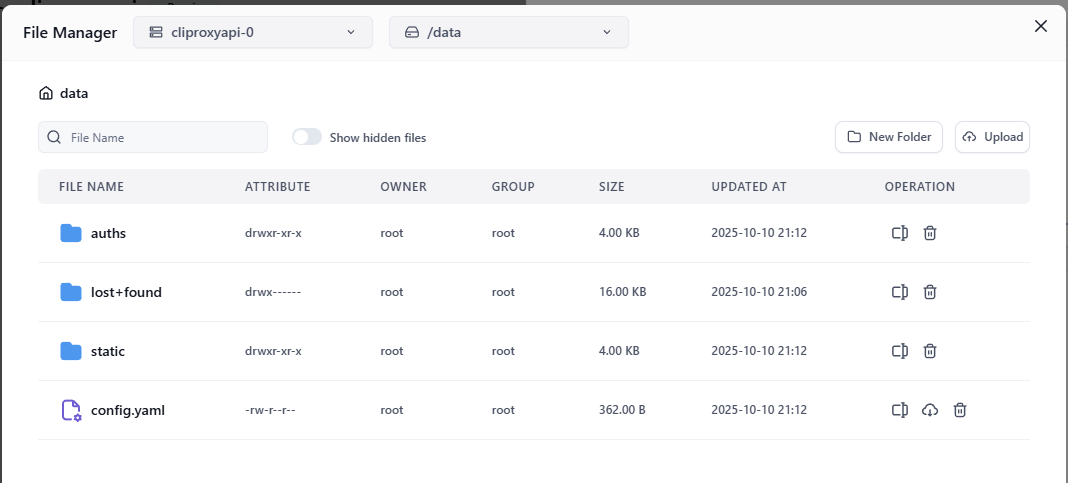
Wait a moment, after the container status becomes Active again, we can see that a new file has been generated in Local Storage
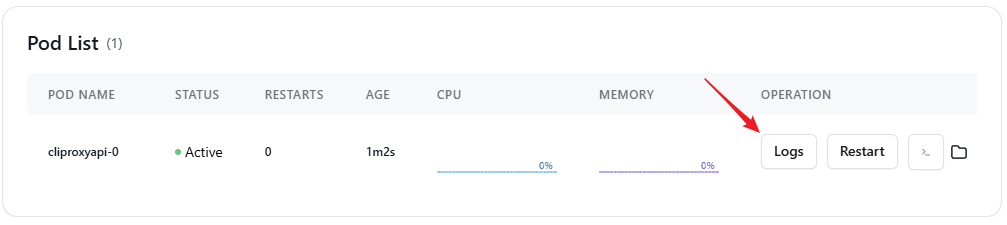
At the same time, click the Logs tab, you can see the log information as shown in the figure below

So far, CLIProxyAPI has successfully completed the entire deployment process.
Use EasyCLI for remote OAuth authentication
Next, we use another official project EasyCLI to perform remote OAuth addition.
EasyCLI is a supporting project of CLIProxyAPI, which provides a graphical user interface (GUI) to manage CLIProxyAPI. Its biggest highlight is that it supports the complete OAuth authentication and authorization process (not just uploading authorization files, but also handling the entire authorization callback process), which is something that CLIProxyAPI's own WebUI cannot do.
Please go to the EasyCLI program release page to download the version suitable for your operating system (the author provides Mac, Linux, and Windows versions). This tutorial takes the Windows x64 version as an example.
After opening the program, select Remote and enter the URL we recorded before
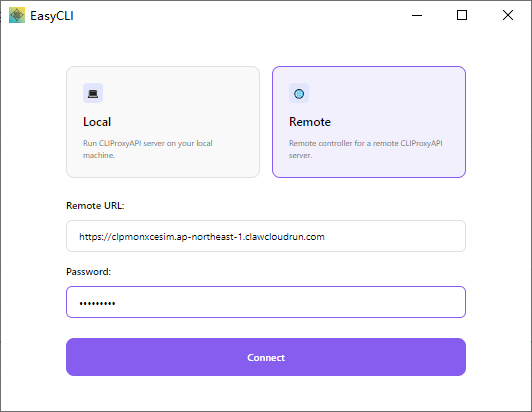
Enter the remote-management.secret-key set in config.yaml for the password (in this example, it is ABCD-1234)
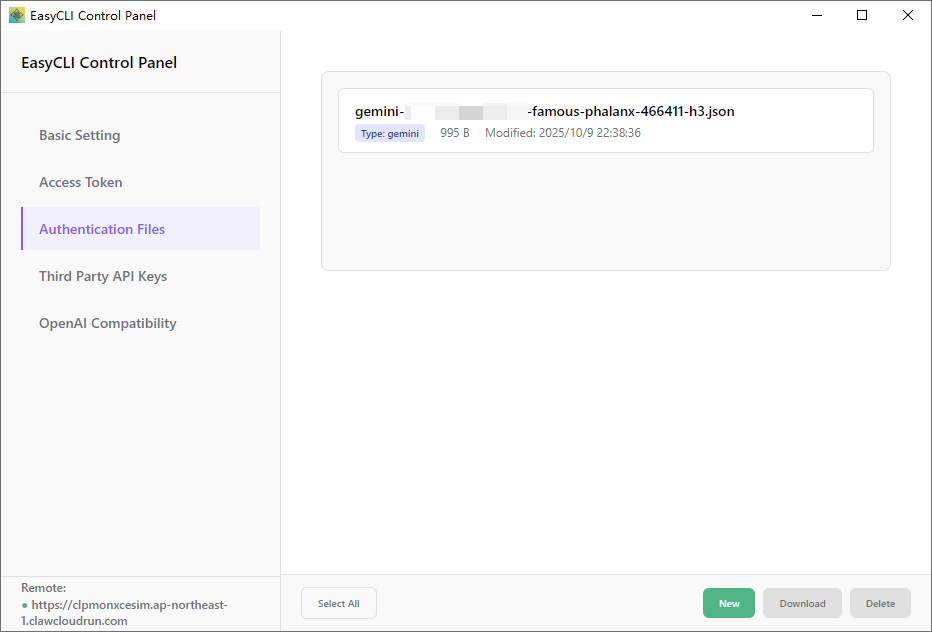
Click Authentication Files -> New in order
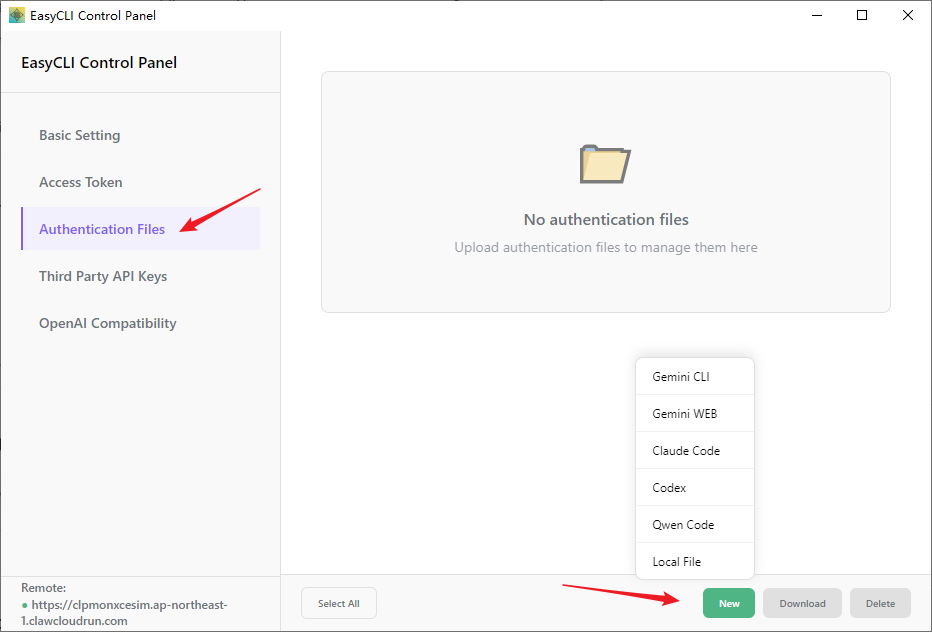
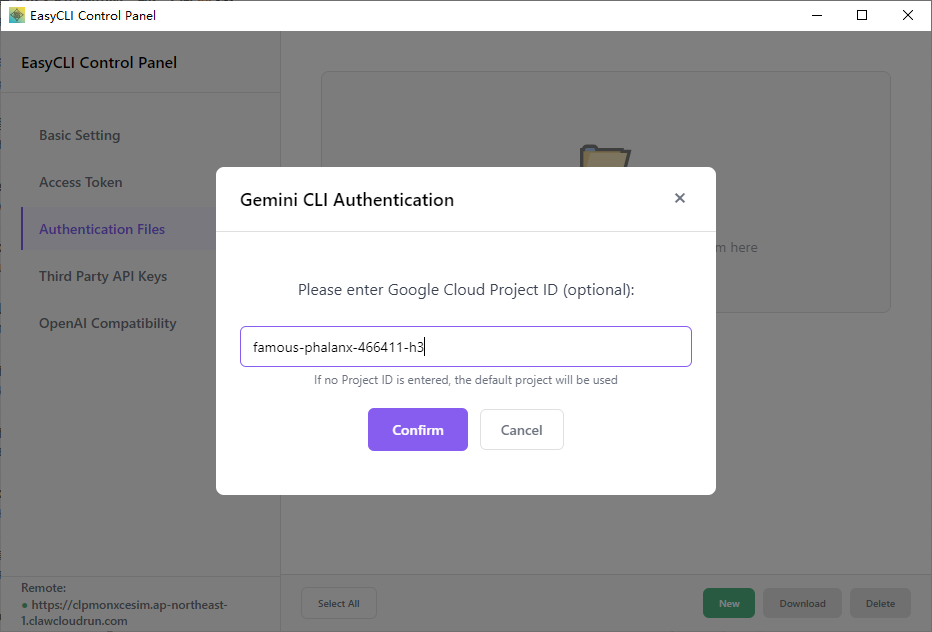
Select the provider you need to authenticate, fill in the required fields, and click Confirm
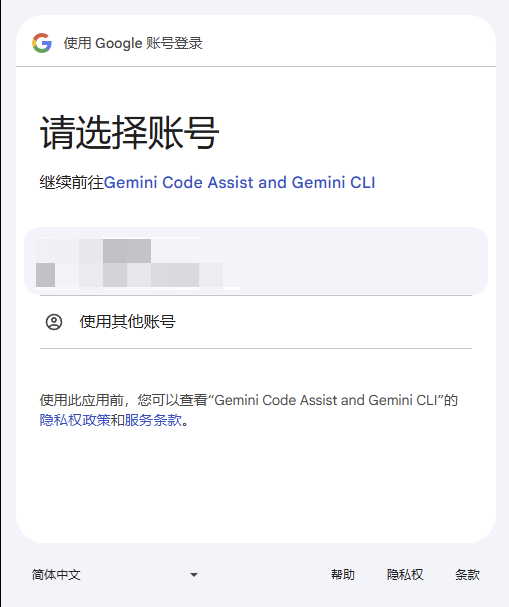
The OAuth link will appear on the page, click Open Link
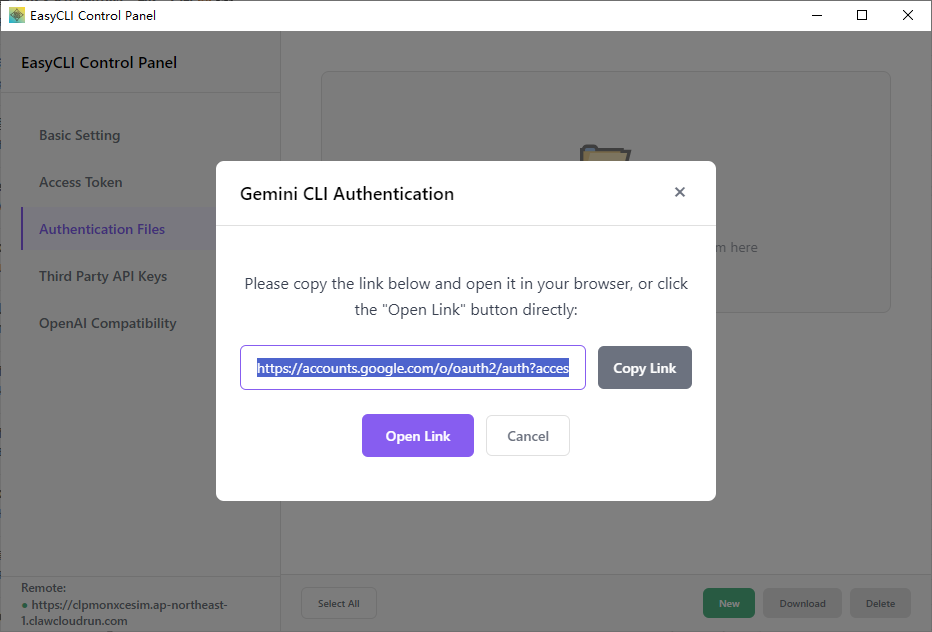
The program will automatically open the browser and jump to the OAuth link, and EasyCLI itself will enter the callback receiving state
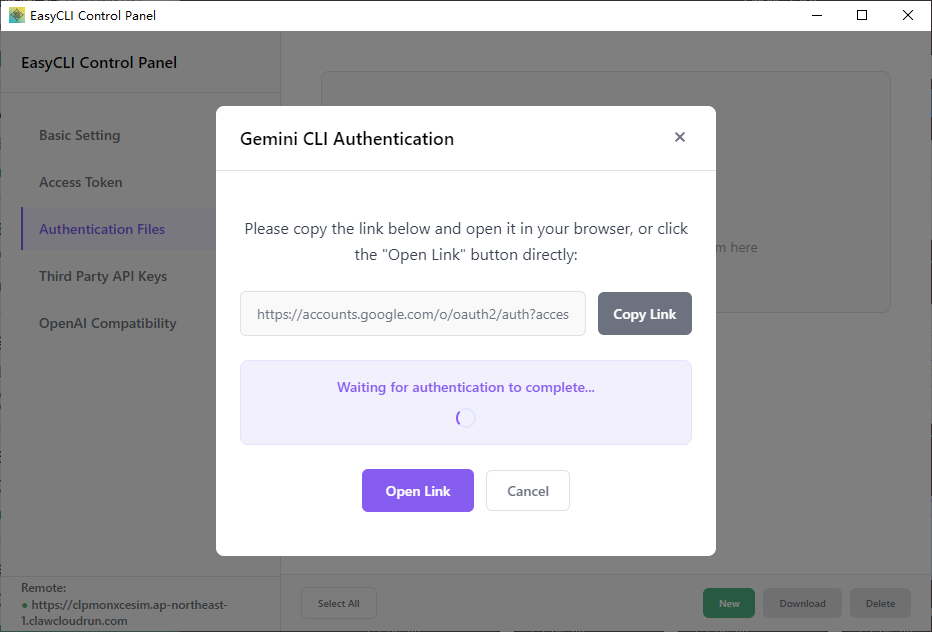
In the opened browser page, we log in to the account and complete the authorization and authentication process
After completion, you can see the newly generated configuration file in the Authentication Files list
Verification
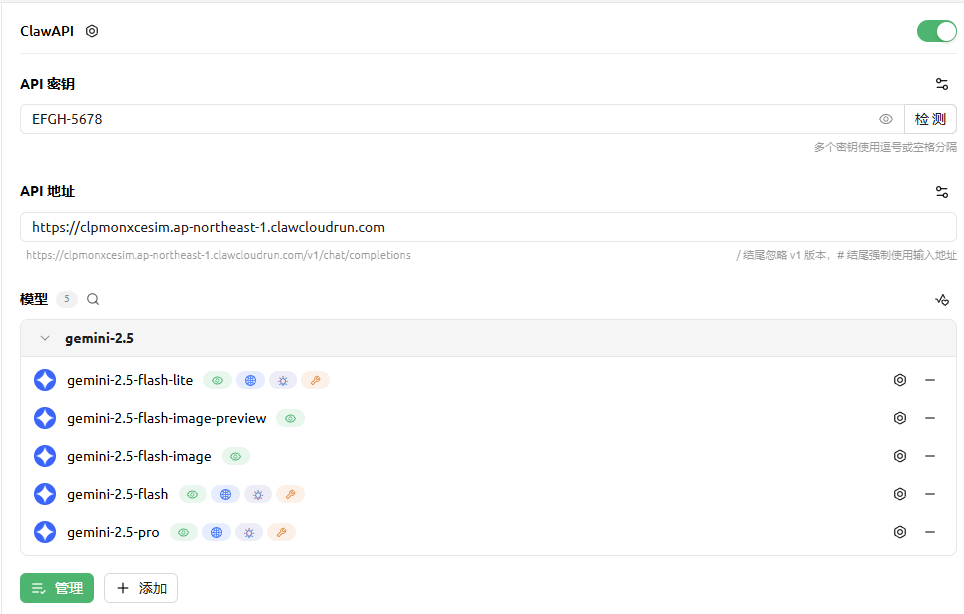
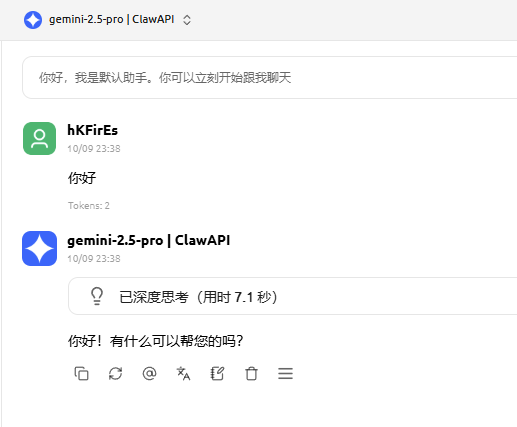
Let's test it with Cherry Studio again. As shown in the figure, fill in the API key and API address according to the configuration file content
Success!
The rest of the functions of EasyCLI are left for you to explore. In fact, except for the OAuth authentication part, the other functions of EasyCLI are basically the same as the system's built-in WebUI. You can also perform other configuration management by visiting https://your-CLIProxyAPI-access-link/management.html (for an introduction to WebUI, please refer to this article "Six: The Beginner's Favorite GUI", although the introduction is also relatively short =.=)